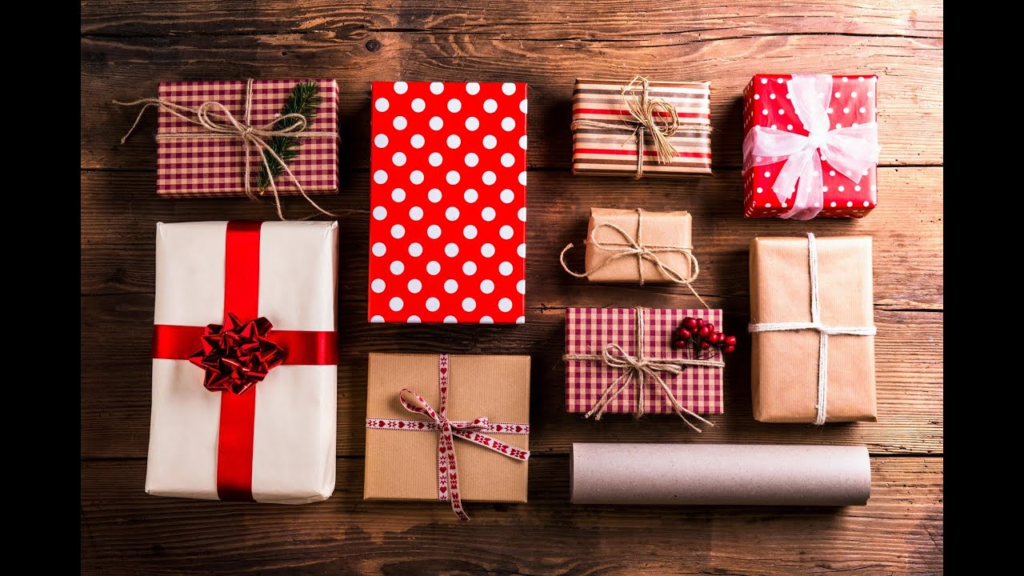
5 Unique and Customizable Gift Boxes You Can Make In Minutes
5 min read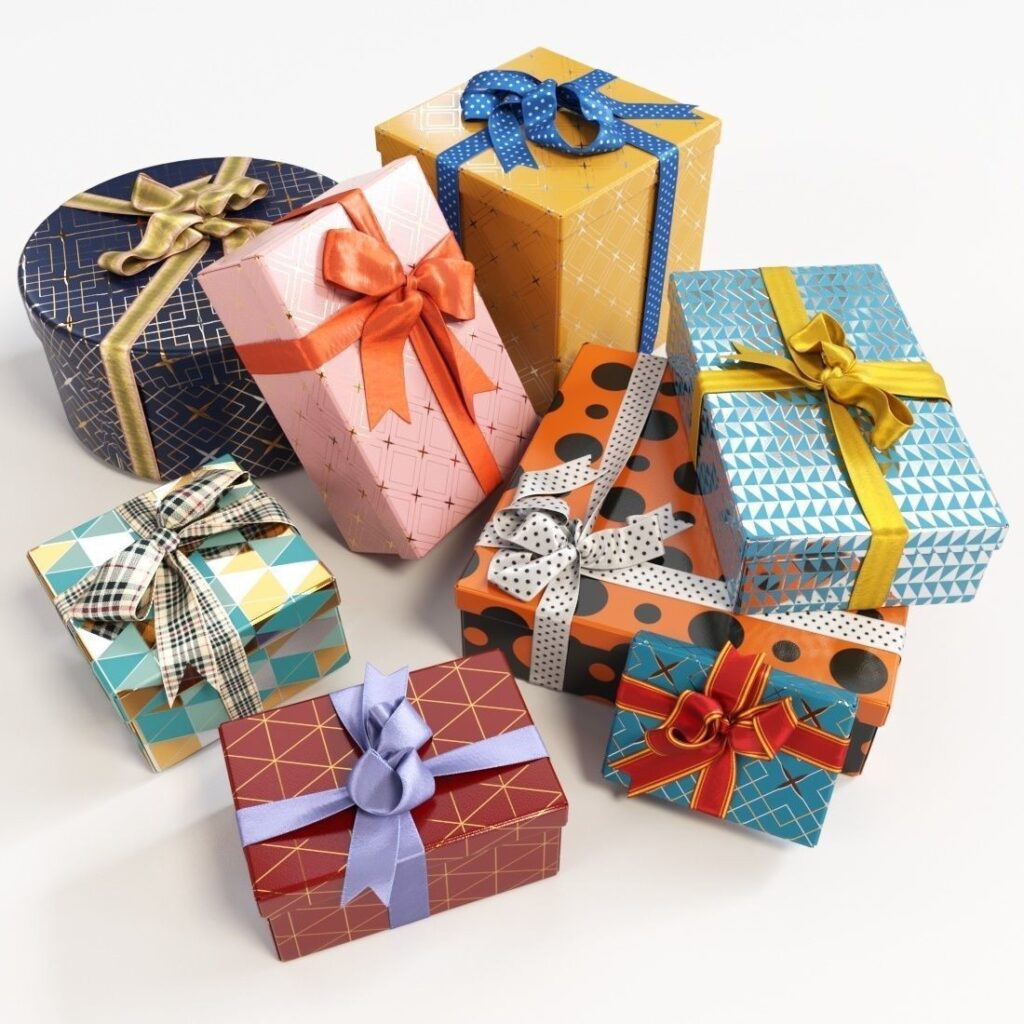
It’s that time of year again—time to get shopping for presents! And what better way to do it than with some unique and customized boxes? With a little bit of creativity and some simple supplies, you can make your very own custom black gift boxes in minutes. Whether you’re looking for something special for a loved one or want to make sure your business stands out from the rest, these boxes are sure to please. So put on your creative hat and check out these five unique and customizable gift box ideas. You won’t regret it!
What you’ll need
If you’re looking for a unique and customized gift, you can make your own boxes in minutes using supplies from your local craft store. You can choose any design or theme that you like, and then customize the box to fit the recipient’s interests and style.
boxes of various sizes
paper or cardstock (for the inside of the box)
scissors
glue gun and adhesive tape
markers or pens (for labeling)
ribbon (for tying)
To start, choose your design. If you’re making a square or rectangular box, begin by cutting out a template from paper or cardstock. The template should be large enough to cover the entire front and back of your chosen box shape, but not so large that it takes up too much space on your work surface. Once you have your template cut out, trace its outline onto the cardboard using a pencil or marker. Be sure to leave enough room around the outside edges of your template so that you can easily cut out the sides later. Cut out the templates using scissors, being careful not to cut into the lines of your design.
How to make the boxes
If you’re looking for a unique and customizable gift, look no further than the gift box! These small containers can be made in minutes with just a few supplies and some creativity. Plus, they make great presents for anyone on your list! Here are five easy steps to creating custom gift boxes:
1. Gather your supplies. You’ll need a size H cardboard box, scissors, a hole punch, white poster board (or another similar smooth surface), and painter’s tape.
2. Decide the design you want your gift box to have. Once you have the supplies gathered, start cutting out the desired design onto your white posterboard or another smooth surface. Be sure to leave enough room around the perimeter of the design so that you can neatly fold it over once it’s taped to the box.
3. Apply painter’s tape to both sides of the boxed design, making sure that it covers all of the cut edges uniformly. Then carefully fold over the top portions of the design so that they overlap slightly – this will help keep them secure while you punch holes in them using your hole punch.
4. Punch holes all around the edge of each side of your boxed design using your hole punch, being careful not to go too deep – you only want to barely dent the paper surface. Finally, use a finishing nail or screwdriver to push through these punched holes and secure them by gently hammering down on them until they’d visible anymore (you may
How to personalize the boxes
If you’re looking for a unique and customizable gift box that is sure to impress, look no further! These boxes can be made in minutes using just a few supplies, and they are perfect for any occasion. You can customize the boxes to fit any gift recipient, and they are a great way to show your creativity and craftsmanship.
To make your own gift box, you will need:
-Cardboard box
-Scissors
-Paint or fabric paint
-Stickers or decals
-Ruler or measuring tape
-Glue gun and glue sticks
-Tweezers or craft knife
1. Cut the cardboard box into an appropriate size (for example, 6 inches wide by 4 inches tall). Make sure the lid is straight and even across the top.
2. Paint or fabric paint the lid of the cardboard box black. Allow it to dry completely before attaching the stickers or decals.
3. Trace around the desired design onto the lid of the cardboard box with a ruler or measuring tape. Cut out the design with scissors, then use a glue gun and glue sticks to attach it to the lid of the box.
4. Finally, cut two small slits on opposite sides of the glued design so that it can be easily removed (if desired).
5. Give your gift box away!
How to store the boxes
Looking for a unique and customized gift? Check out these easy-to-make gift boxes! You can customize them to fit any occasion or personality, and they’ll be a hit with anyone on your list.
To create your own gift box, start by gathering supplies. You’ll need some cardboard, a sharp knife, some scissors, a tape measure, and a drill.
Measure the width of your cardboard box and cut out the bottom to make it flat. Make sure the sides are at least twice the length of the box so that you have enough room to work.
Next, cut a hole in the top of each side of the box big enough for your fingers to fit through. This is where you’ll attach the lids to your boxes!
Use tape measure and scissors to trim away any excess cardboard around the hole in the top of each lid. Then use a drill to make holes in each lid just big enough for your nails to go through. Secure each lid with tape measure and nails.
Your gift boxes are now ready for decoration! If you’re planning on giving them as gifts, add some ribbon or stickers to match their recipient’s personality or event. If you’re keeping them for yourself, add a pretty bow or sticker label!
Conclusion
If you’re looking for a unique, personalized gift that’s sure to impress, look no further than the gift box! With just a few simple steps, you can create stylish and eye-catching boxes that are perfect any time of year. Whether you want to make a traditional gift box or something more creative, our tips will help you get started. So what are you waiting for? Get creative and start packing some fabulous gift boxes today!